1. Ecosystems placed with a global Environment are only limited by the Rules-of-Nature. Ecosystems can also be attached to vectors, which define their extent and give them priority over global Ecosystems in Environments.
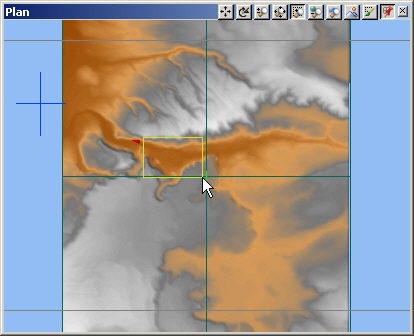
2. Use the Zoom Box in the Plan view to click corners around the widening of the canyon east of the Main Camera.
3. Undock and drag the view out to create a larger view to draw on.
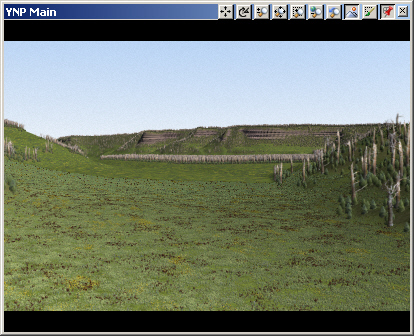
4. Render a preview.
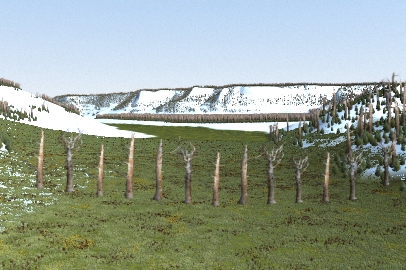
5. The render illustrates the challenge of Distance Dissolve textures. What looks good from one camera view doesn’t necessarily look good from another. We need another version of the Grassland Ecosystem for planimetric renders.
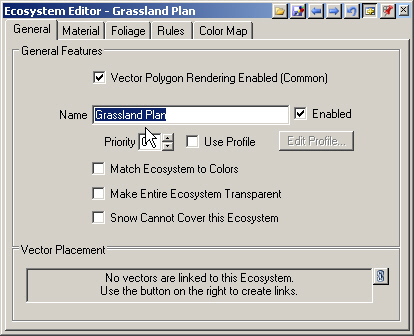
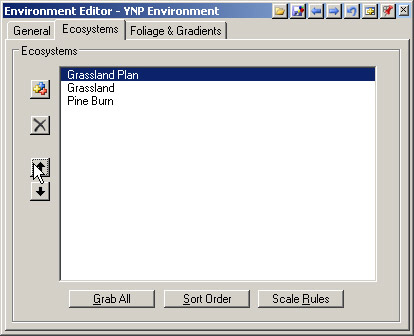
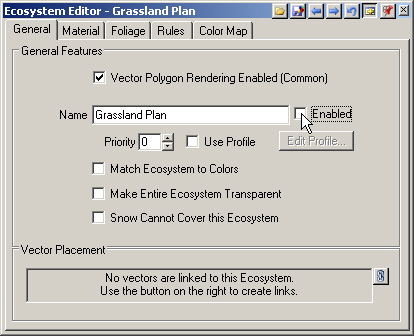
6. Go to the Scene-at-a-Glance and clone the Grassland Ecosystem and rename it Grassland Plan. We could go to the Foliage page and disable the Understory and its foliage there, but let’s do it another way.
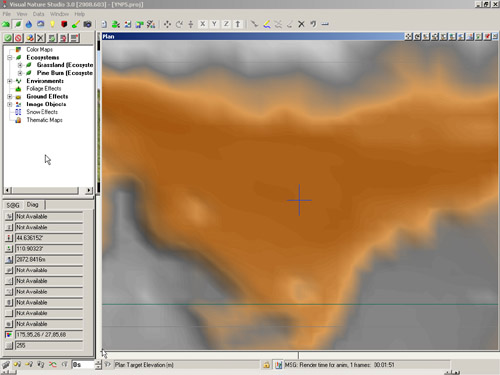
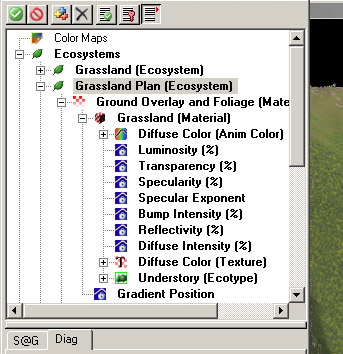
7. Expand the Scene-at-a-Glance. Expand the Grassland Plan Ecosystem, Ground Overlay and Foliage, and Grassland Material.
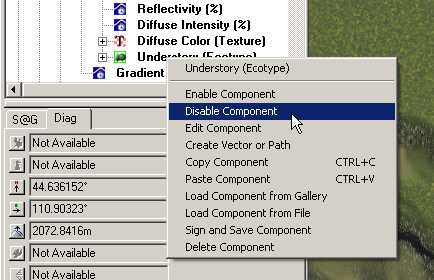
8. Select the Understory and disable it. The Grassland Plan Ecosystem will render its Ground Overlay only.
9. Collapse the Grassland Plan Ecosystem and return the Scene-at-a-Glance to its normal state.
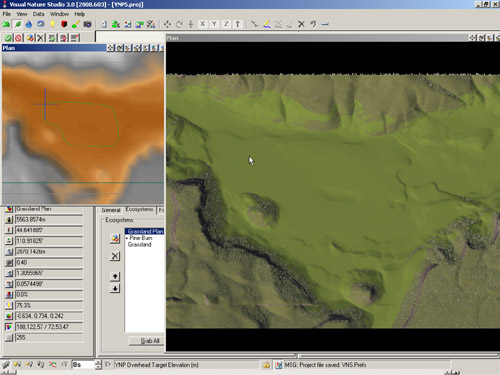
10. Open the YNP Environment Editor. Turn to the Ecosystems page and Grab All. Select the Grassland Plan Ecosystem and Raise Ecosystem Rendering Priority to the top of the list. Save the project and render a preview.
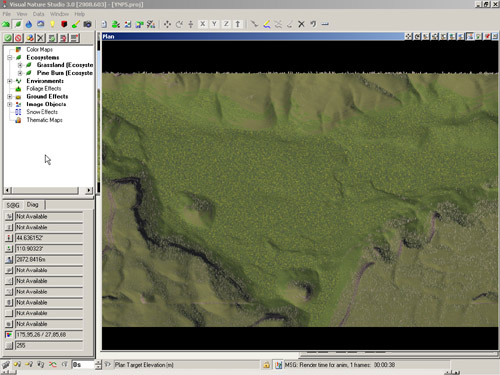
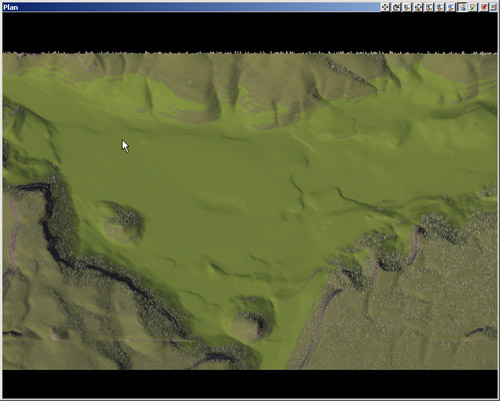
11. Diagnostic Data tells us that the Grassland Plan Ecosystem rendered on the valley floor and the Pine Burn Ecosystem covers the steeper slopes. The Grassland Ecosystem did not render because the Grassland Plan Ecosystem took all the qualifying polygons.
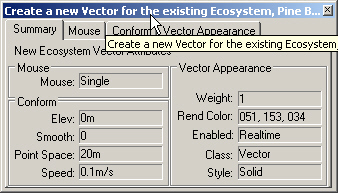
12. Select the Pine Burn Ecosystem in the Scene-at-a-Glance and Create . Check the Create window titlebar and confirm that you’re creating a new vector for the existing Ecosystem, Pine Burn.
13. Left-click a couple of vertices along the north edge of the raised area in the valley.
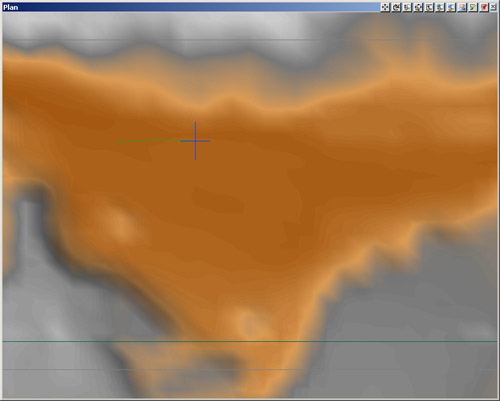
14. You won’t see the vector on the render. If you want to check your progress, key F8 to switch to a realtime view and select Yes to Retain diagnostic data. This will save the render channels in memory. Key F8 to switch back to the render. Digitizing on a render gives you scene detail and more precise vertex placement.
15. Another useful method is to have two views of the same camera open: one rendered for digitizing and one realtime for monitoring your progress. Move the rendered view to the right so you can see the upper left camera view. Open another Plan Camera in that view. Undock it and move it to the left. We can now see the vector as we create it. Continue digitizing around the central high ground.
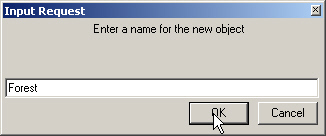
16. When you’re done, Right-click and name the vector Forest.
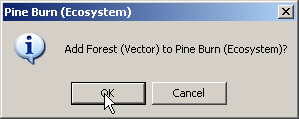
17. Confirm that you want to add the vector to the Pine Burn Ecosystem.
18. Dock the realtime and rendered views. Save the project and render a preview.
19. Activate the realtime view, and zoom in with 4 taps of the + key. Move the Plan Camera so you can see part of the vector. Save the project and render a preview.
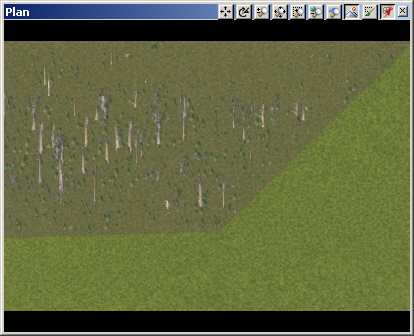
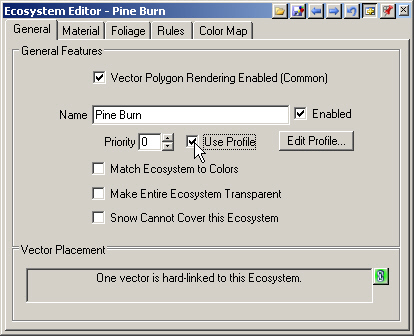
20. The transition from the vector-bounded Pine Burn Ecosystem to the global Environment Grassland Ecosystem is sharp, something that rarely happens in nature. Double-click the Pine Burn Ecosystem in the render to open its editor. Turn to the General page and select Use Profile.
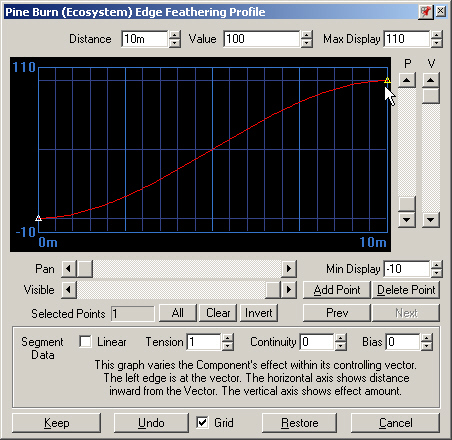
21. Edit Profile. A profile controls how the Ecosystem is rendered from the vector inward. The left point on the profile is a Distance0 meters from the vector. The Value is 0, which you can think of as a percentage of polygons. This means that at the vector, the Pine Burn Ecosystem does not render on any terrain polygons.
22. Click the right point on the curve. The Distance is 10 meters in from the vector and the Value is 100. This means that 10 meters in from the vector the Pine Burn Ecosystem renders on all polygons.
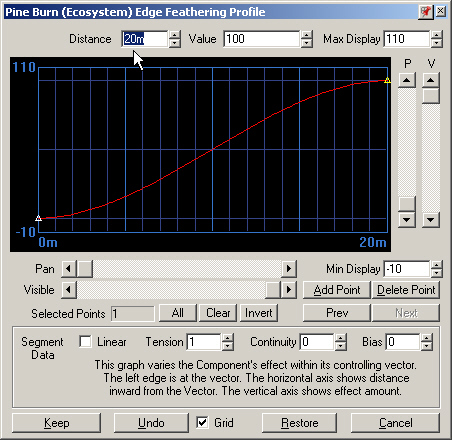
23. Increase the Distance to 20 meters. The S shape of the curve softens the first appearance of Pine Burn at the vector and eases out the last of the Grassland at 20 meters. Keep the changes.
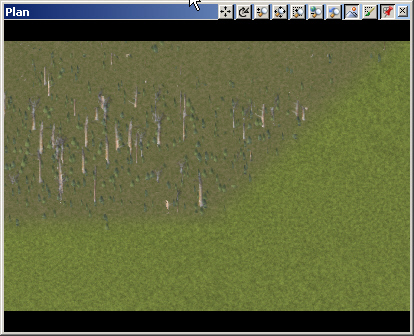
24. Save the project, activate the right view, and render a preview. The profile yields a more natural edge to the Ecosystem. Change the upper left view back to the YNP Main Camera.
25. Move to the Grassland Plan Ecosystem Editor. This was just for Plan view operations and we don’t need it now. Disable it.
26. Save the project and render a YNP Main preview.