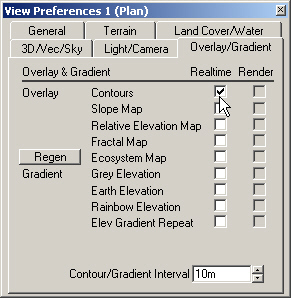
1. Open the PlanView Preferences to the Overlay/Gradient page, and select Contours. This will make it easier to trace a drainage.
2.We’ll need room to digitize the stream, so undock the Plan view and drag it out to enlarge it.
3. Like Lakes, Streams are a 2-step process. First, we’ll dig a streambed into the terrain with a linear Terraffector. Then we’ll add a Stream.
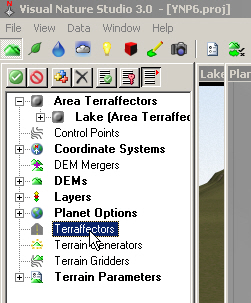
4. Go to the Terrain Task Mode, select the Terraffectors category, and Create.
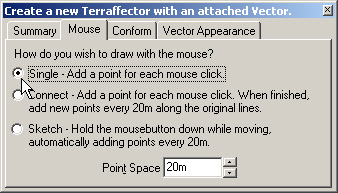
5. Turn to the Mouse page and select the Single drawing mode.
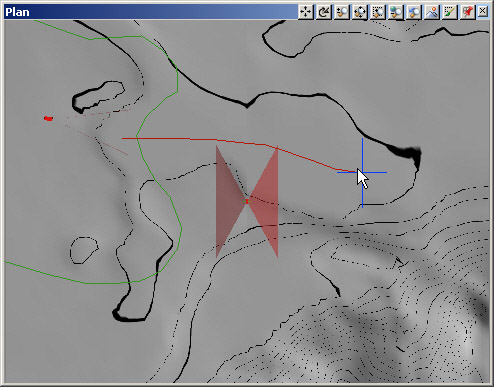
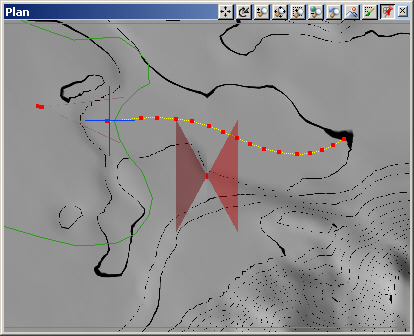
6. Click on the Plan view titlebar to bring it forward if it’s hidden. Start inside the Lake vector in front of the Lake View Camera and left-click points along low points in the terrain.
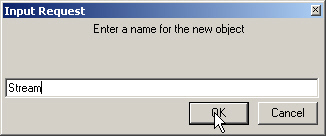
7. Right-click to finish and name the vector Stream.
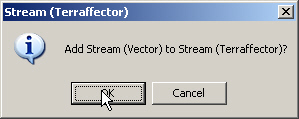
8. Add it to the Stream Terraffector.
9. We could use one of the many provided Components, but we’re going to make our own. Close out the Component Gallery and dock the Plan view.
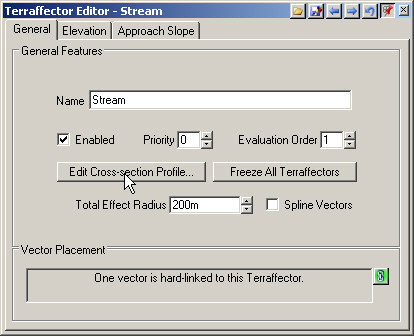
10. Like an Area Terraffector, a Terraffector uses a profile to control the way the terrain affected. Unlike an Area Terraffector, a Terraffector is a linear feature based on a vector line, not a closed vector shape. Edit Cross-section Profile in the Terraffector Editor.
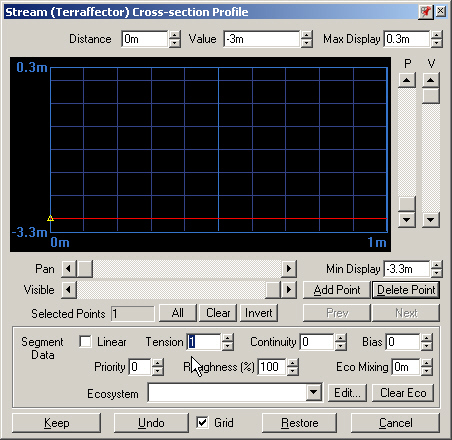
11. There is no default profile here; we build it entirely from scratch. The leftmost point is the vector. Terrain will be affected outward on both sides and the ends based on this profile. Change the Value to –3 meters and Tension to 1. This is the centerline of the streambed.
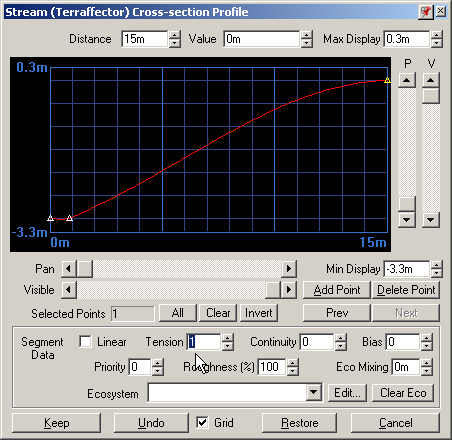
12. Add Point and click on the graph, and repeat, to add 2 new points anywhere along the profile. Change the Distance on the rightmost point to 15 meters, make the Value0, and change the Tension to 1. This is the edge of the streambed. Fifteen meters out from the vector the Terraffector will no longer effect the terrain.
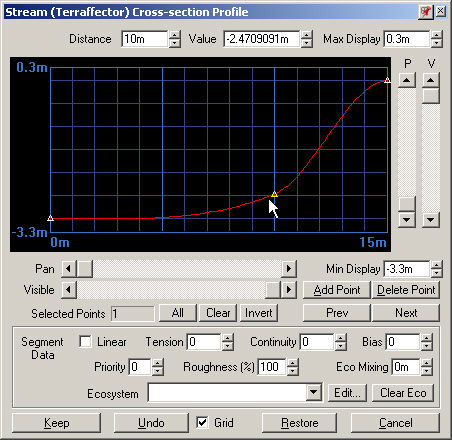
13. Select the second point and change its Distance to 10 meters. Click and drag it up to create a cross-section something like this. If you want to move the point left or right, hold the Ctrl key down while you click and drag.
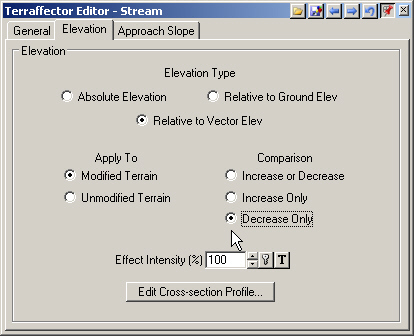
14. Keep the profile and go to the Elevation page. Change the Elevation Type to Relative to Vector Elevation and Comparison to Decrease Only.
15. Save the project and render a preview.
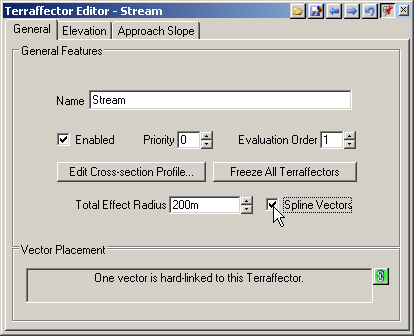
16. If your streambed has sharp turns in it, turn to the Terraffector EditorGeneral page and enable Spline Vectors.
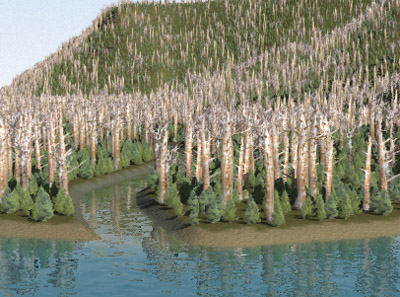
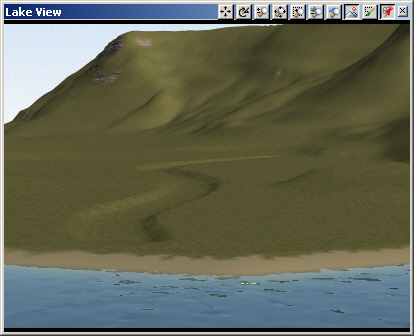
17. Don’t expect your first stream to look as good as your first ocean. Streams are small features that cut into terrain that usually doesn’t have stream-size detail.
18. Alt+click the Stream Vector in the Plan view to activate it.
19. Show Points from the toolbar to make them visible in the realtime Plan view. By default, they’re all selected and show up red.
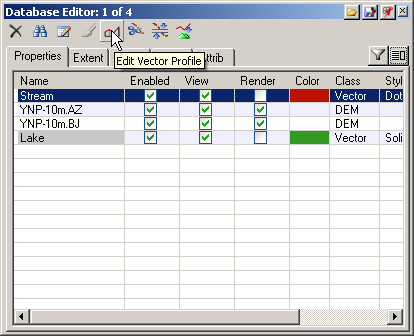
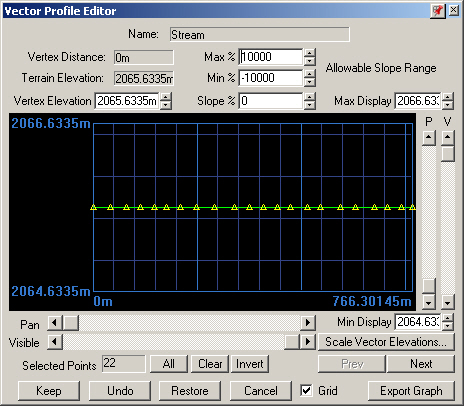
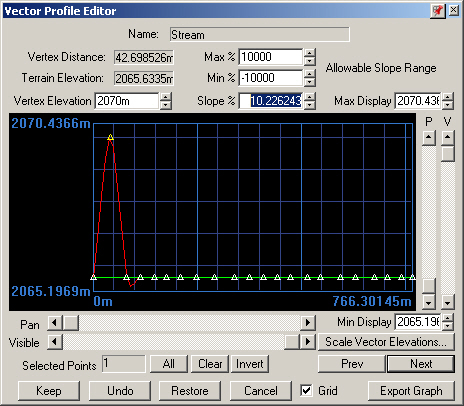
20. To see what the vector profile looks like, bring the Database Editor forward and Edit Vector Profile
21. The Vector Profile Editor shows elevation on the vertical axis and distance along the vector on the horizontal axis. The vector is represented by the red line and the ground appears in green. In this case, most of the vector is hidden behind the terrain.
22. All the vertices are currently active. Use the Next button to activate just the second vertex, at the lake end of the stream. Increase the Vertex Elevation to 2070 meters.
23. Render a preview. As expected, the vertex has been raised high enough that the Terraffector no longer has an effect at that point. The Terraffector is set to decrease only so the terrain is not modified above its non-Terraffector elevation.
24. Restore the profile to its original state and close the editor.