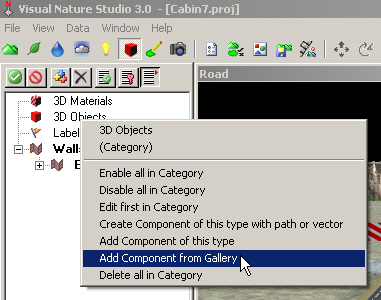
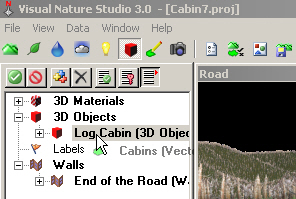
1. All we have left are the cabins. Go to the 3D Object Task Mode, select 3D Objects, and Add Component from Gallery.
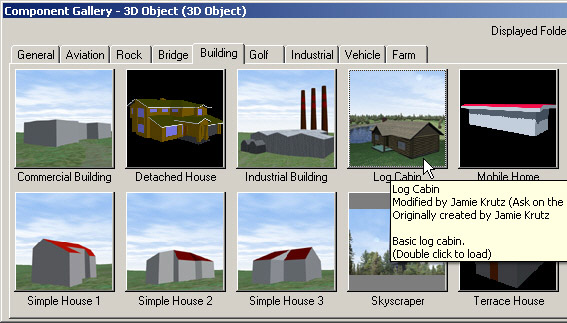
2.Go to the Building page in the Component Gallery and load the Log Cabin.
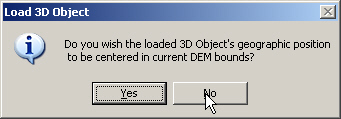
3. We’re going to use a vector to position the cabins, so answer No when asked if you want to center the cabin’s position in the current DEM bounds.
4. Expand the 3D Objects category in the upper Scene-at-a-Glance pane. Expand the Vectors category in the lower S@G tab. Drag the Cabins vector to the Log Cabin 3D Object.
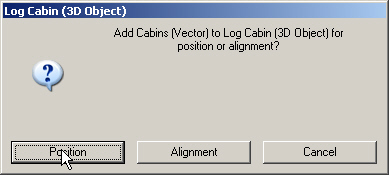
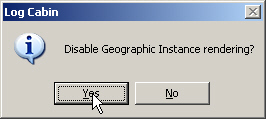
5. Use the Cabins vector for Position and disable Geographic Instance rendering.
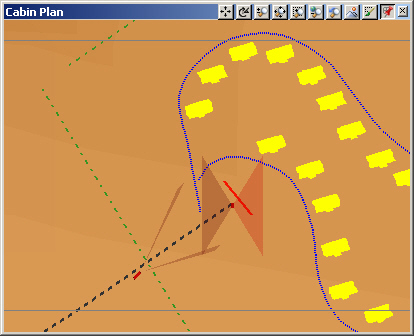
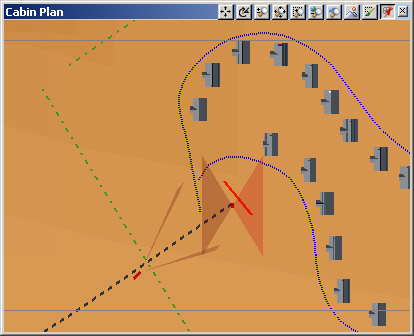
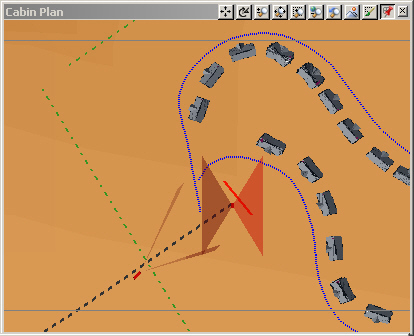
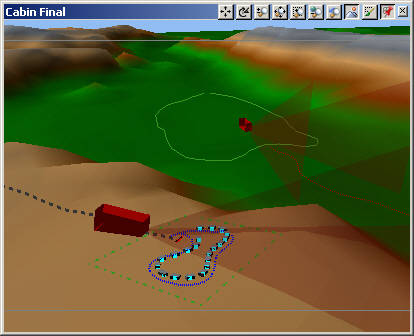
6. Switch the Cabin Plan view back to realtime mode and zoom in a notch. The cabins are active and show up highlighted in yellow.
7. There may be a delay during interactive operations because the cabins are set to Preview Detail, which can slow response when several high-polygon 3D Objects are in view. Once we get them aligned, we can switch to the faster Box Preview setting.
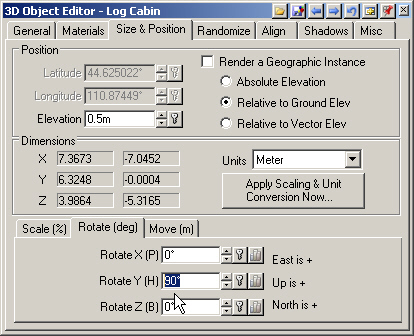
8. All the cabins have the same odd heading. Go to the Size & Position page and select the Rotate tab. The cabins have Rotate Y (Heading) value of -19°. Change it to 90°.
9. The cabins are now all facing west.
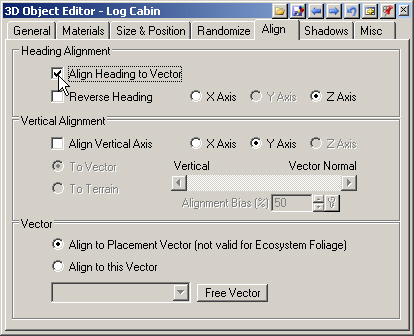
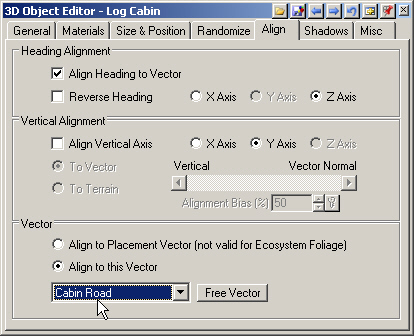
10. Another great feature in VNS is 3D Object Alignment, which makes housing developments like this quick to set up. Go to the Align page and select Align Heading to Vector.
11. The cabins will align their Z axis to the placement vector by default.
12. The placement vector alignment is close, but we want the cabins aligned to the road. Select Align to this Vector in the Vector section and pick the Cabin Road from the dropdown list.
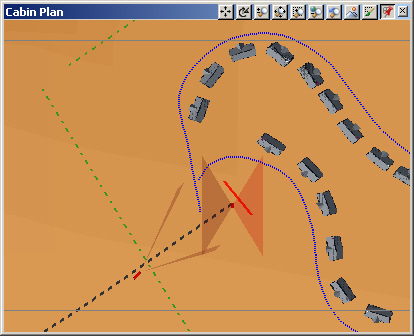
13. The cabins are now aligned to the Cabin Road.
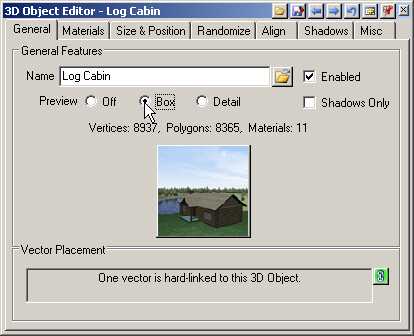
14. Go to the General page and change the Preview to Box. This should speed up operations a bit.
15. Save the project and render a Cabin Plan preview.