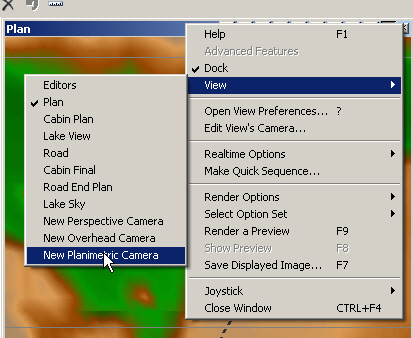
1. Now for the clouds. Switch the Lake Sky view back to realtime mode. Open the Plan view popup menu and select View > New Planimetric Camera.
2. The Plan Camera view will be replaced by the new Planimetric Camera view.
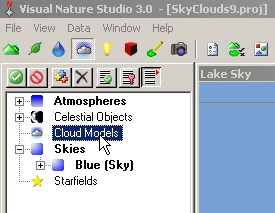
3. Go to the Scene-at-a-Glanceand double-click the empty Cloud Models category to add a new Component. The views will update with the default Cloud Model bounds.
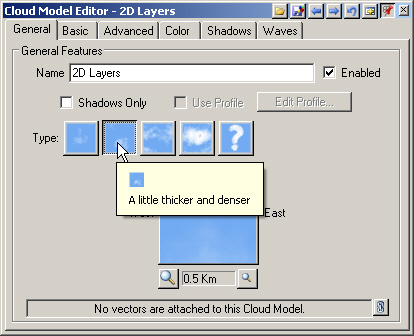
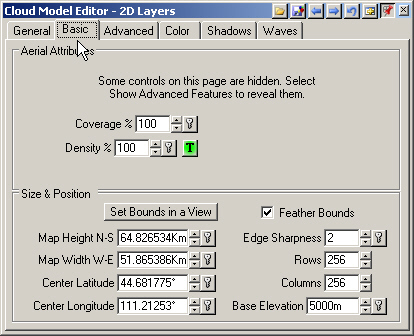
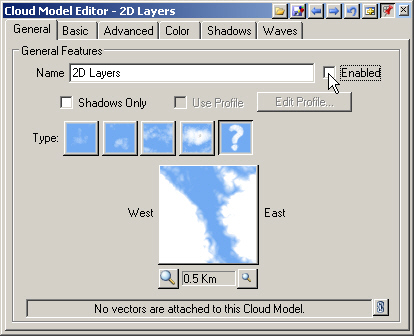
4. Rename it 2D Layers. Select the second A little thicker and denser type.
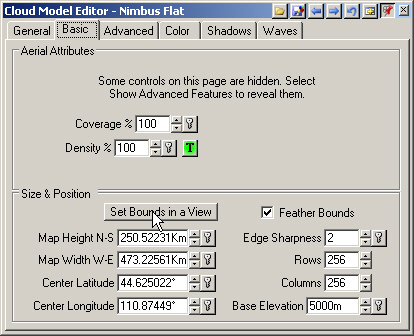
5. Turn to the Basic page and Set Bounds in a View.
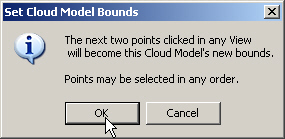
6. The Set Cloud Model Bounds box reminds us that the next two points clicked will become the Cloud Model bounds.
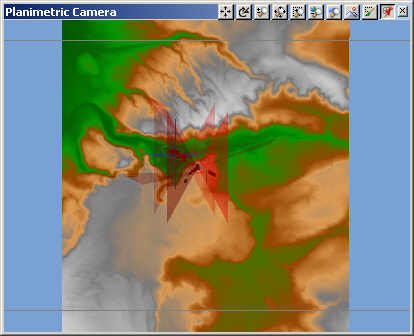
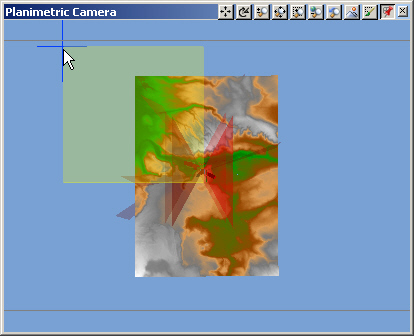
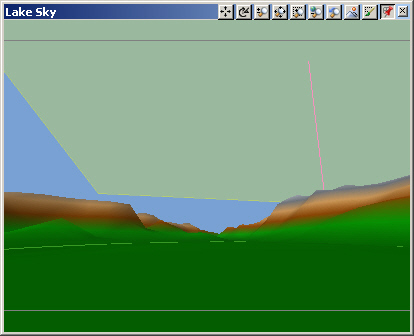
7. Activate the Planimetric Camera view and zoom out once with the – key. To minimize render time, we only place clouds where we can see them in camera views. Left-click once behind the Lake Sky Camera near the lake. Click again to the northwest. The view will refresh with a shaded box representing the Cloud Model.
8. Looking at the Lake Sky view, you can tell from active Cloud Model plane that we didn’t make it big enough.
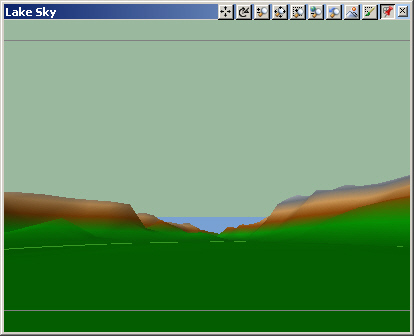
9. Zoom back another notch in the Planimetric Camera view. Set Bounds in a View again and create a larger Cloud Model area. Make it large enough to cover the sky in the Lake Sky view. If it doesn’t, repeat the process until it does.
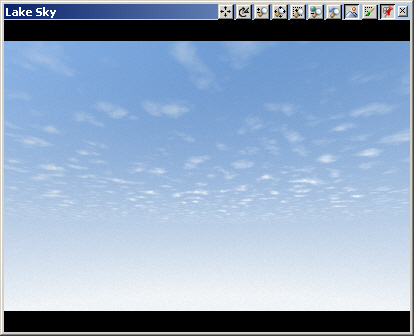
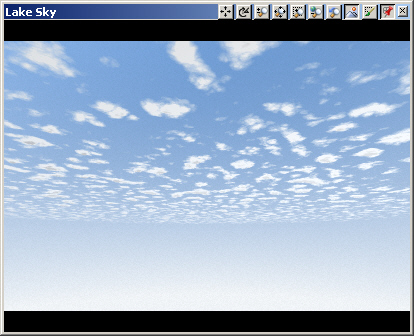
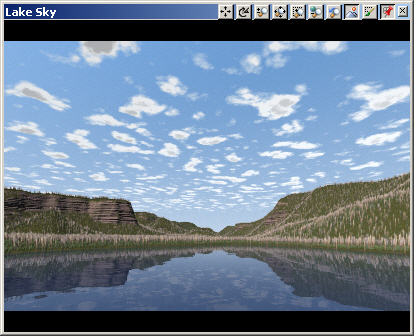
10. Save the project and render a Lake Sky preview.
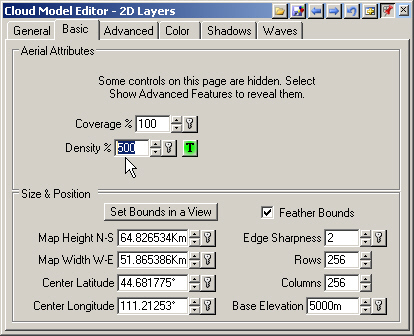
11. This type of Cloud Model uses stacked layers to give the illusion of vertical depth. This works very well for clouds at high elevations. The Basic page has the Coverage and Density controls, the key tools for customizing your clouds.
12. Think of Coverage as Clouds per unit area. The maximum value is 100%.
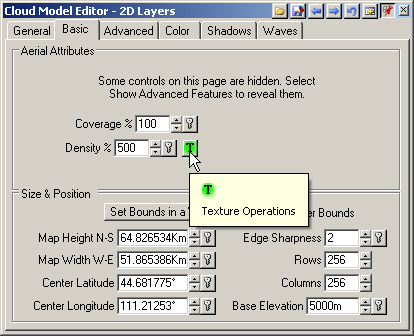
13. Density controls individual cloud density and size within the texture. Increase the value to 500%. Save the project and render a preview.
14. The Density texture is the Cloud Model pattern itself.
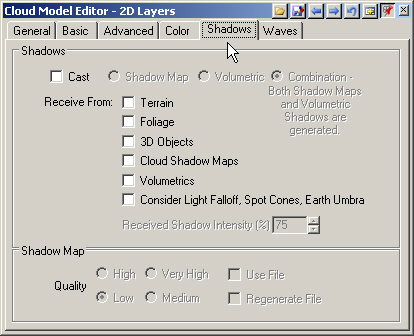
15. The Shadows page controls the casting of shadows by Cloud Models.
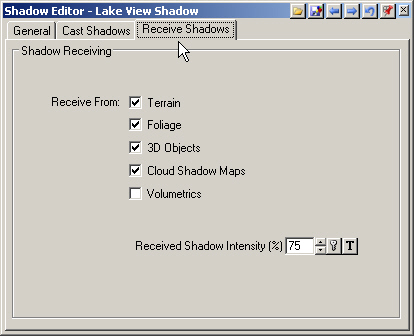
16. Receiving of shadows by terrain and foliage is controlled by a Shadow Component. Go to the lower S@G tab and double-click the Shadows category to open its only Component, which is currently disabled.
17. The Receive Shadows page sets what shadows the terrain receives.
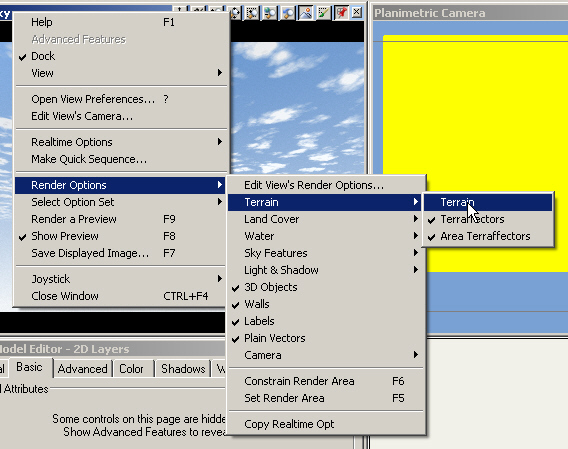
18. Open the Lake Sky popup menu and select Render Options > Terrain > Terrain to enable it for rendering.
19. Save the project and render a preview.
20. Return to the Cloud Model EditorGeneral page and disable the Cloud Model.